Compared to many previous versions, Windows 10 unfortunately lacks the option to simply deactivate automatic updates in the settings. The best thing is to receive a short message if your computer plans to restart for installation purposes Operating system is planning to restart for installation purposes. Often, however, even this process starts at the most inconvenient times. The download of a comprehensive system update can slow down Windows 10 noticeably.
Deactivating automatic updates can therefore be very practical from time to time. However, we would generally advise against this step, as it is better to stay up to date to protect against malware. Unless, of course, you have been struggling for some time with a Update errors with Windows 10 for some time. Or are the proud owner of Windows 10 Pro and can delay the automatic Windows update.

For everyone else, we go into detail about the 3 best methods to disable automatic updates in this post. Try the variant that seems easiest to you and follow the handy step-by-step guide.
How do I disable automatic updates in Windows 10?
- Switch off the automatic update service in the properties
- Set the Internet connection as a clocked connection
- As a Windows 10 Pro user, delay all automatic updates
Let’s start with the first tutorial, which leads to success in almost all cases and lets you disable automatic updates:
(1) Turn off Automatic Update Service in Properties
Attention: Before you start taking action, you should be made aware of what deactivating the updates of Windows 10 means. Your activated operating system will be dropped from all future updates. If you want to start the update process manually at regular intervals, this no longer works via the settings. You must first undo the steps you are about to take.
The journey begins in the Start menu. If you have trouble displaying your taskbar, take a quick look at our detailed guide.
- Directly in the Start menu or via the Windows 10 search function(Windows logo key + S), enter either services.msc or simply services in the text field. Right-click to run the application as administrator.
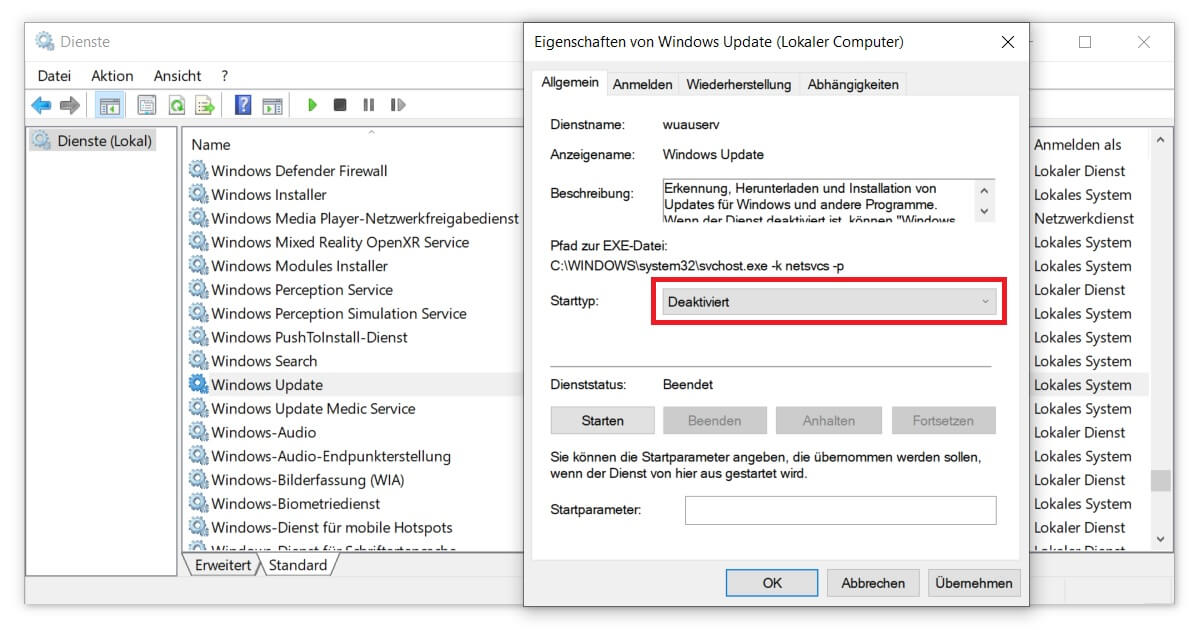
- A new window opens that displays all local services on your computer. Find the entry with the name Windows Update in the list. You may have to switch to the Standard tab.
- A click with the right mouse button opens the properties. Here you will find the option to deactivate automatic updates.
- Change the setting in the Startup type drop-down menu from Manual to Disabled.
- Confirm the changes with OK. Done.
In some situations, however, Windows takes advantage of the situation and reactivates automatic updates on its own. You may know Microsoft’s persistence if you’ve tried in the past, Turn off Cortana. All this is usually done under the guise of protection against malicious cyber attacks that use backdoors. In this case, another method that creatively circumvents the problem helps:
(2) Set Internet connection as clocked and disable automatic updates
Due to the size of some updates, Windows 10 determines by default that no automatic download starts for clocked internet connections. Here, clocked is understood to mean a chargeable internet connection. This means, for example, a mobile stick that does not have a flat rate . This is because the maximum data volume would quickly be reached with constant synchronisation attempts.
Users of Windows 10 Home follow these steps to disable automatic updates with this method:
- Open the Windows settings via the cogwheel symbol in the Start menu or by pressing the key combination Windows logo key + I.
- In the Network and Internet settings, select the tab on the left that corresponds to your current Internet connection. In most cases, click on WLAN and then again on the active network.
- Further down, flip the switch at Set as clocked connection so that it shows On.
- The changes are applied automatically. If in doubt, you can perform a quick restart.
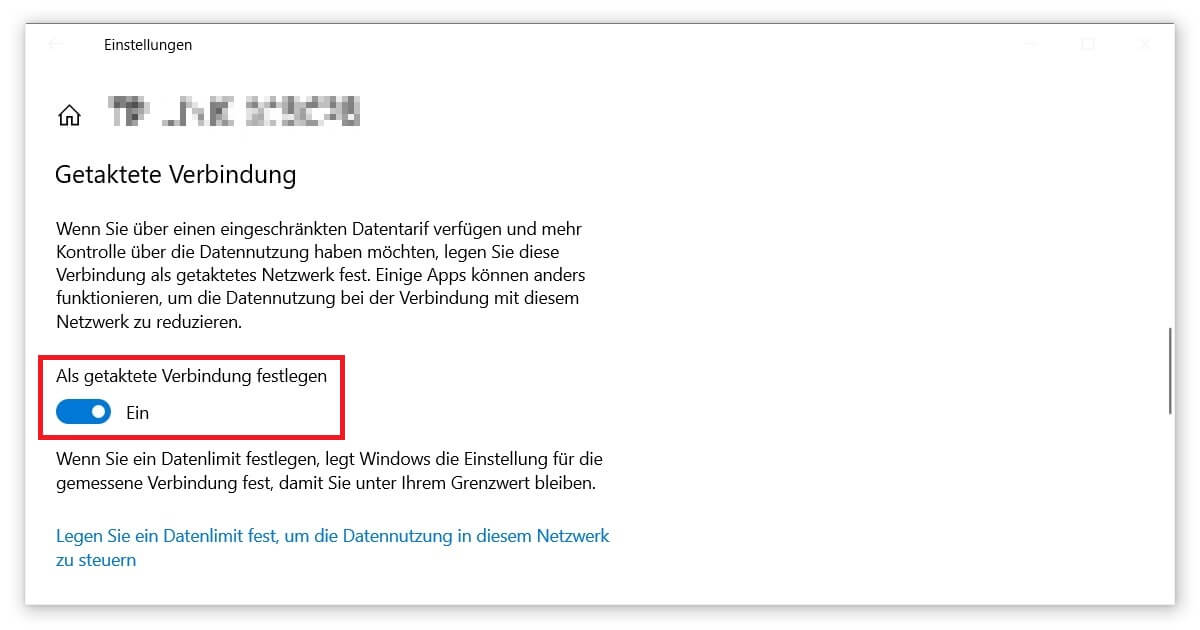
Don’t worry, this adjustment will not result in any additional costs for your provider. This setting only affects your operating system and ensures that automatic updates are deactivated.
(3) As a Windows 10 Pro user, delay all automatic updates
If you are the proud owner of Windows 10 Prothen you have another option for deactivating automatic updates:
- Open the Windows settings as described above (Windows logo key + I).
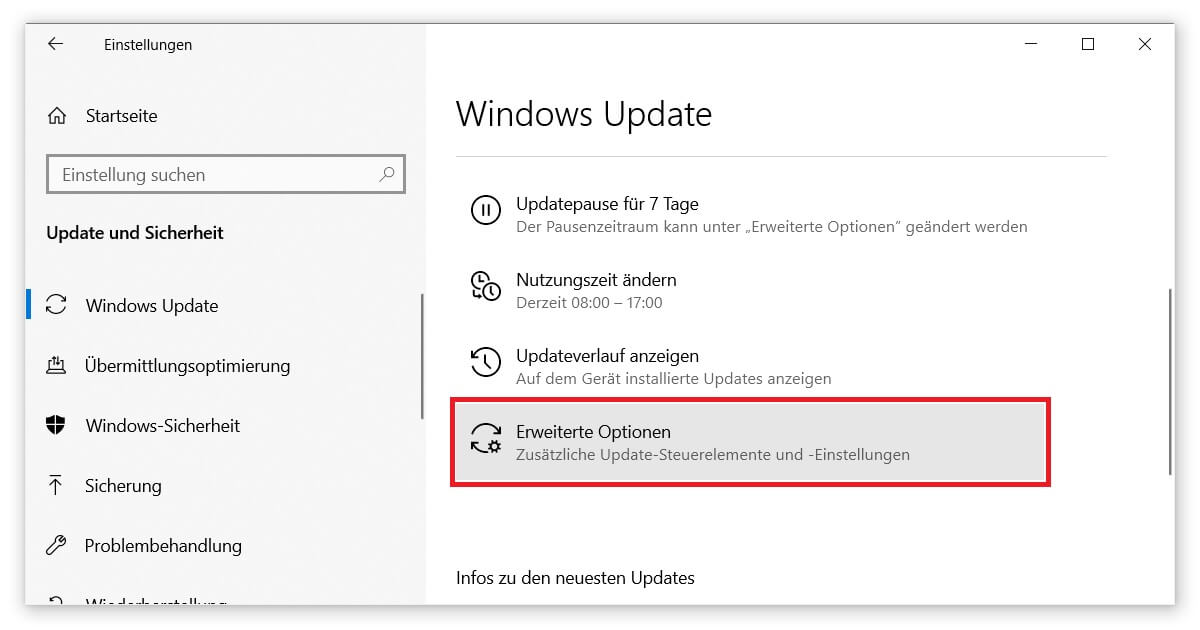
- This time, click directly on the Update and Security category. The Windows Update submenu should already be selected.
- Further down you will find the Advanced Options.
- Under Suspend Updates you can now decide not to install any updates for up to 5 weeks. This applies from the time you make the change.
If you have missed exactly this function, a Upgrade to Windows 10 Pro may be worthwhile. In the shop of keyportal.uk shop you will find low-priced offers for all relevant versions. For companies, for example, we can recommend Windows 10 Enterprise an operating system specially designed for professional requirements. Feel free to look around.


