Quickly copying, cutting and pasting lines of text or sections of images has long been one of the core functions of Windows. Accordingly, Ctrl + C, Ctrl + X and Ctrl + V are among the most frequently used keyboard shortcuts. Every screenshot you make by pressing the Print key first ends up in the clipboard of Windows 10. This temporary memory makes many tasks much easier.
Nevertheless, there have been some shortcomings in the use of the clipboard since the first Windows versions. The fact that only one element at a time could end up in the Windows clipboard was particularly annoying for the workflow. If you accidentally pressed the wrong keys or clicked the wrong button just once, the previous entry disappeared irrevocably – and in contrast to deleted documents it cannot be restored via a backdoor.

But these problems are a thing of the past thanks to Windows 10’s extended clipboard! With version 1809 of the Operating system microsoft has finally listened to its users and even given them cross-device cloud storage .
New: Using the Windows 10 extended clipboard
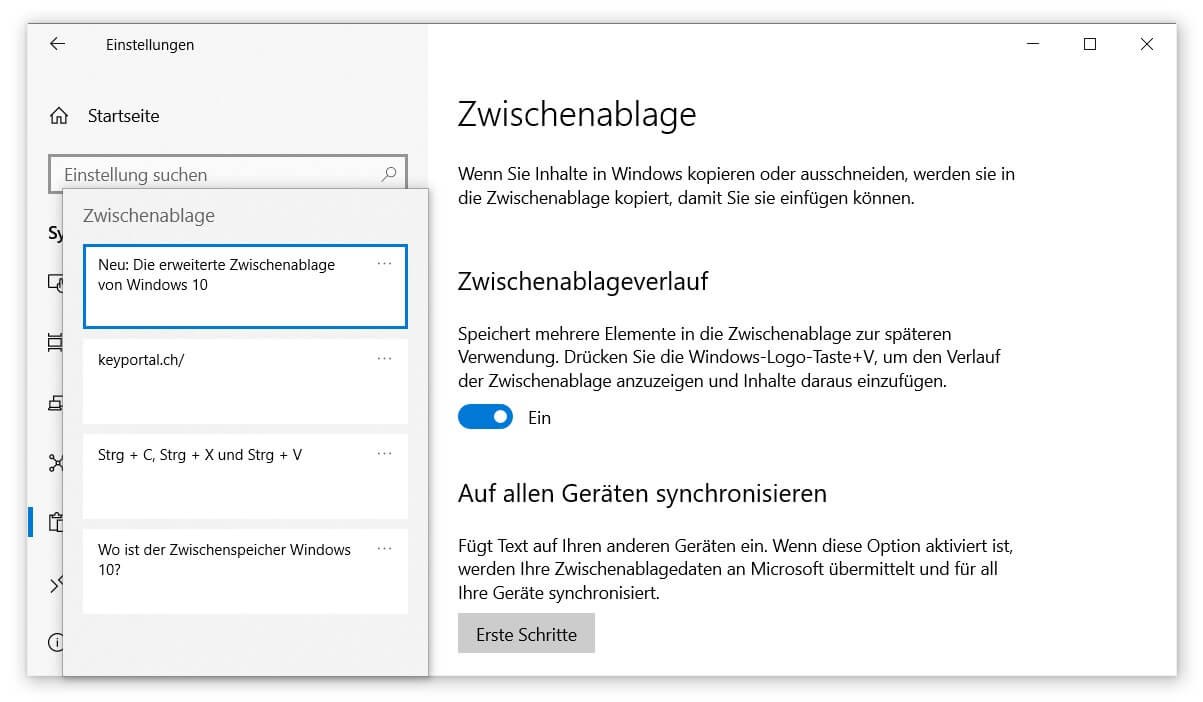
A new entry was added in the Windows settings with version 1809. You can find it by clicking on the cogwheel symbol in the start menu or by using the key combination Windows logo key + I. If you have problems with your Windows key, throw it to the right. If you have problems with your Windows key, just take a look at this entry Post. Once you are in the settings, go to System and then to the clipboard options on the left-hand side.
Your history – where can the clipboard be found?
If the first slider is still set to Off, you can change this with a click. This switches on the history of your clipboard under Windows 10. This applies to both Windows 10 Pro as well as for all other current variants. By pressing the Windows logo key + V, you now get a practical overview of all recently cached elements. A total of up to 25 entries end up here before the oldest are deleted again.

The clipboard window is displayed at a location that Windows deems appropriate – for example, at the bottom or directly at an active text field. A click on any entry is sufficient to insert it at the selected position. It is just as easy to delete an element from the clipboard. To do this, use the delete key or select the menu function by clicking on the three dots. There you can also empty the entire memory or attach particularly important reminders.
Synchronise with all connected devices
Everything that currently remains in your history can be automatically saved in the cloud – if you want. To do this, go back to the familiar settings and move the second slider to On. Alternatively, if OneDrive is not yet set up on your device, click on Getting Started. This service is the basis for synchronisation. You can then call up your clipboard across devices. The only prerequisite: The stored User account must be identical.
Bear in mind, however, that with this function all your data stored in this way ends up at Microsoft. This is not much of a problem if it is a YouTube link , but can quickly become critical if Access data are involved. That’s why we recommend that you only activate this second option for synchronising your clipboard in Windows 10 if you use it constantly. Otherwise, just be happy about the extended history and leave it at that, because protecting your privacy is a priority.


