Excel is one of the comprehensive applications of the Microsoft Office Suite. As with previous versions, Excel 2019 also allows you to set up a so-called sheet protection. This allows you to protect a table against unauthorised access with a password that can contain letters, numbers or certain special characters. You can choose whether you want to protect individual sheets or the entire file and can then remove the Excel password protection as desired.
Until Excel 2016, there were even some tips and tricks if you had forgotten your Excel password. However, only the protection of individual pages could be removed. If you want to remove the password protection from a complete Excel spreadsheet, you can only do this by accessing the data. So you should not forget the Excel password – especially if it is a XLSX file is involved. Then the password can also be deleted quickly and easily.

The following instructions are therefore all about how you can (with appropriate access) remove password protection from your own tables.
How can I remove the password protection from Excel?
Unlike Windows 10 folder you don’t need any special software or add-ins for Excel password protection. All functions are already fully integrated into the menu in Excel 2019. Below are the individual steps you need to take if you want to remove password protection:
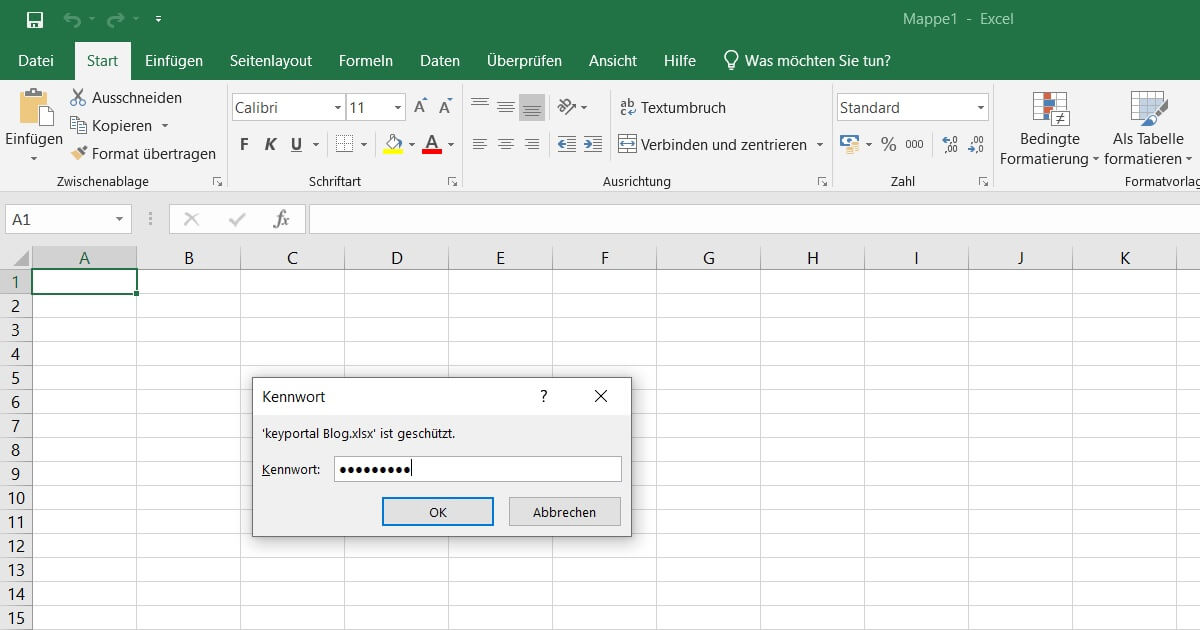
- Open the Excel spreadsheet whose password you want to remove. As shown in the screenshot above, Excel will automatically prompt you to enter the password. Enter the corresponding combination. Only after confirming with Enter will you have access to the file and its contents.
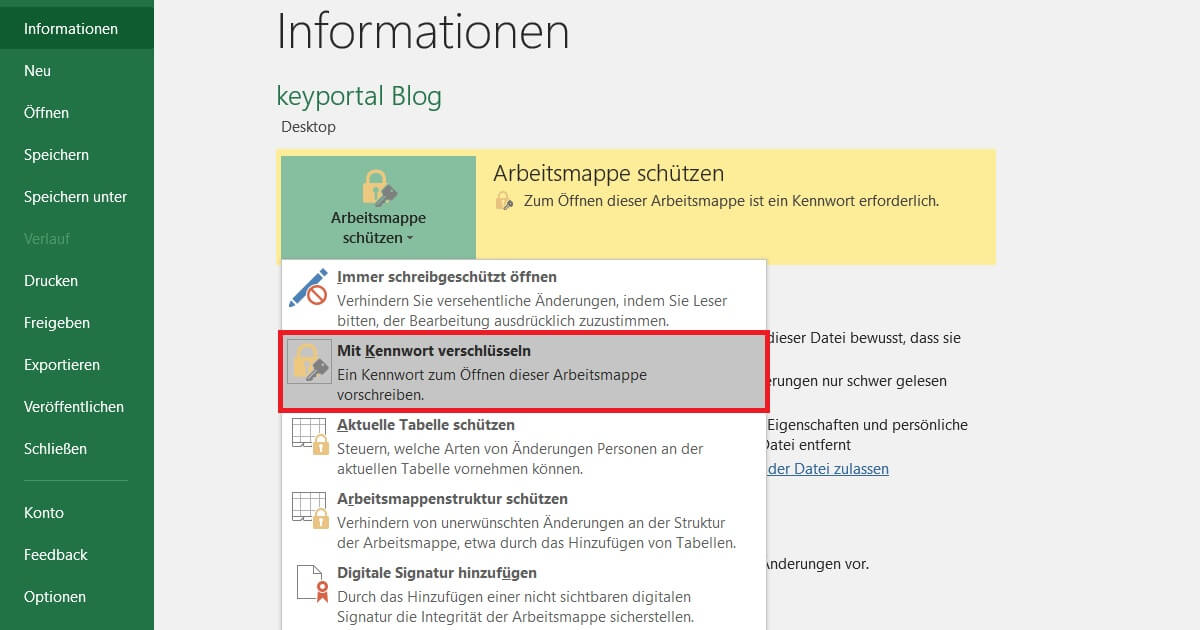
- To remove the password protection of this Excel spreadsheet, click on File in the top left-hand corner of the main menu. You should then be in the Information tab.
- On the Protect Workbook button, Excel offers you extensive options regarding security and write protection. If the file has password protection, this field should be highlighted in yellow. The item Encrypt with password is relevant for you.
- In the new window you can now remove the password protection. To do this, simply delete the previous password and accept the changes with OK. That’s it. The table can now be opened without any problems.

Alternatively, you can set a new password in step 4, which will be valid for the entire file after confirmation. If you have a read-only section, proceed as follows:
How do I remove the sheet protection in Excel?
To do this, you can close the Information menu if it is still open. In the standard view of an open Excel sheet, you can remove write or password protection as follows:
- In the main menu, click on Check this time.
- Under the Changes section you will find the buttons Protect Sheet and Protect Workbook.
- Depending on the type of sheet protection, you remove the corresponding tick or delete the associated password. You may have to enter the old password first.
- Afterwards you can even unlock the workbook.

If you are interested in which features Office 2019 Standard still hides, please take a look at our current offer here. In addition to the latest version of Excel, the package also includes Word, PowerPoint, OneNote, Publisher and Outlook. So you can protect all your documents or remove their password protection in no time. Never again will you have to unlicensed product hassle.


