
As the latest Windows version gets older, more and more features and functions are added. If you like to play around with the settings of your system, you should consider having a Windows 10 restore point created. You can think of this as a save point in a video game that saves the current state for the future. So you can various error messages simply undo it.
Because the longer Windows 10 is used, the more problems can creep in. Especially the Update process is often affected by this. In the worst case, an error can result in you having to completely reset your operating system – and then having to set everything up again. The Windows 10 restore point serves as a backup that saves you a few steps.

We will therefore show you with the help of a clear tutorial how you can create a restore point and then load it. Let’s start with step one.
How do I create a restore point for Windows 10?
Before you can load a restore point, you must first set it under Windows 10 set it. It is recommended that you repeat the following steps at regular intervals so that your backup remains as up-to-date as possible.
- Go to the Windows control panel. The quickest way to do this is to enter the term in the search(Windows logo key + S). Alternatively, you can search for control using the Run function(Windows logo key + R).
- Next, click on System and Security and then Security and Maintenance .
- You should see Recovery as one of the options, which you select. You should now be in Advanced Recovery Tools.
- Click on Configure System Restore. In a new window, select the appropriate drive and proceed to Configure.
- Check whether the item Activate computer protection is set and confirm this with OK. Repeat this configuration for all other drives that are affected by the Windows 10 restore point.
- Then look for the Create button (directly under Configure). All that is missing is a name for your restore point and it will be saved. That’s it.
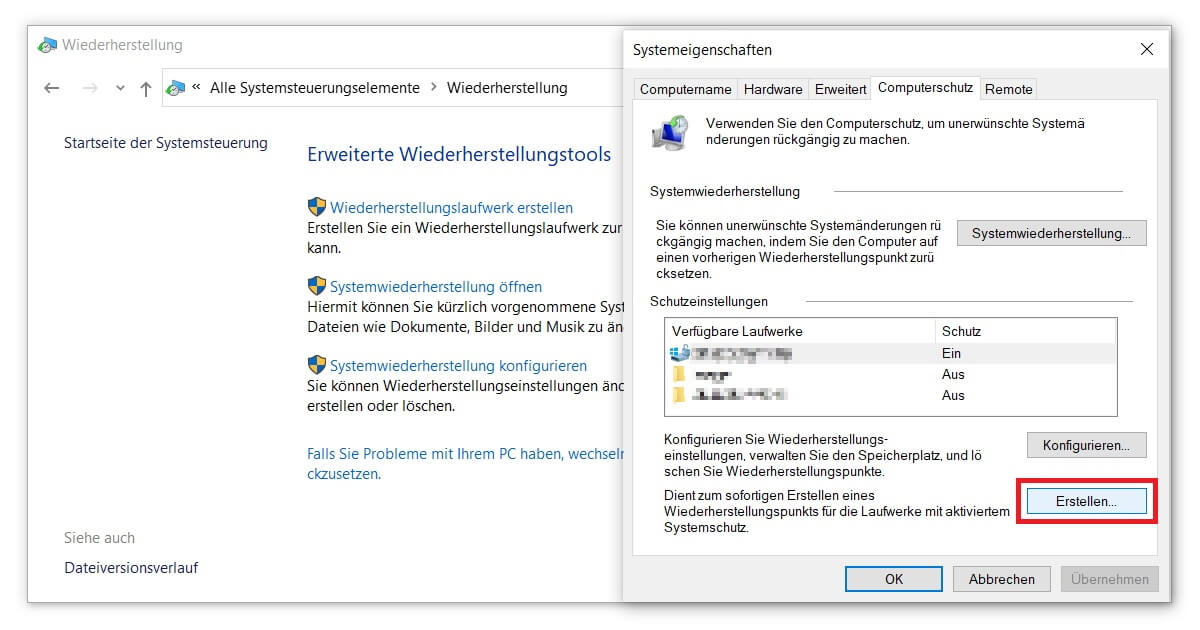
Tip: Always give your Windows 10 restore point a name with a date. Such names can be assigned much better at a later time, especially if several backups are available.
How can I load a restore point for Windows 10?
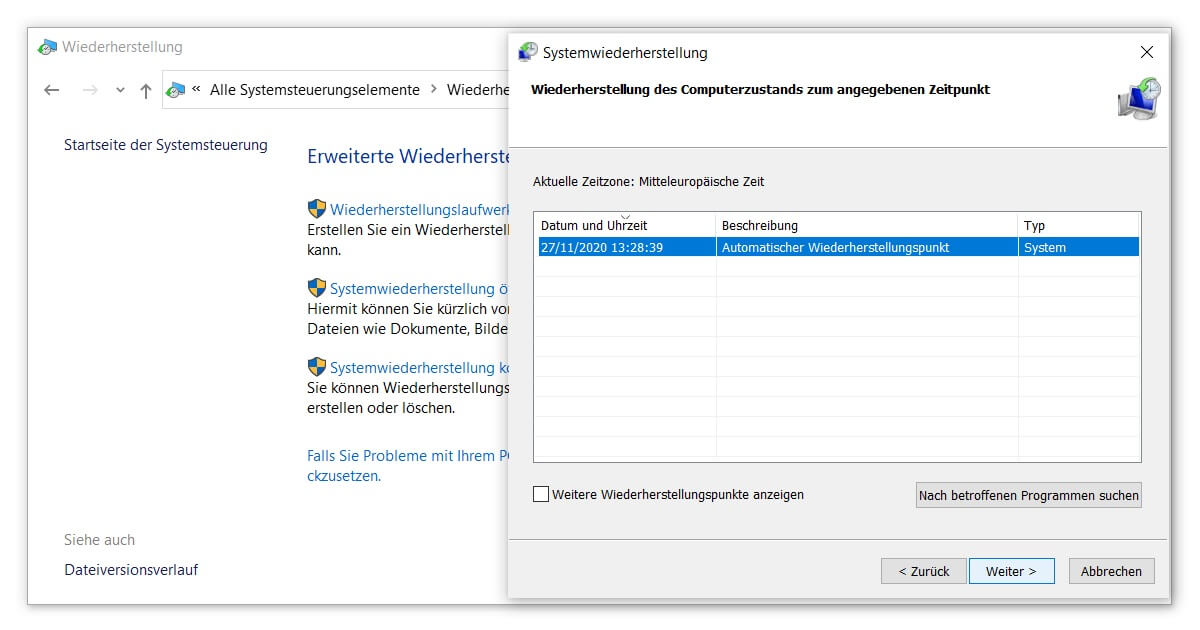
Once the backup has been created, the hard part is already done. If a problem occurs, you can simply fall back on your backup. To do this, follow steps 1 to 3 as described above until you are back in the Advanced Recovery Tools. This time, select Open System Restore. Depending on Type of user account you have to enter your password again at this point in order to access the Windows 10 restore point.
In the window that opens, click Next once. Then select the corresponding restore point from a list and click Next again. You will be shown various details such as date, time and drive. Check these carefully before you start the process by clicking Finish. As a final note informs you, a system restore cannot be interrupted once it has been started. Unsaved data will therefore be lost.
We hope this article was helpful to you. Now you know a little more about the Windows tools. If you are interested in the extended possibilities of the operating system, it may be worth your while to read this article Windows 10 Pro be worthwhile for you. What exactly are the differences to the Home version is explained in our practical guide on this topic. Have fun!


